


The short answer: a build order, not a shopping list
A duty belt is a system, and systems have a build order. Whether it’s your first belt out of the academy or your fifth rebuild after a gear change, the sequence is the same:
- Foundation first. Liner belt plus duty belt, mated — the platform decides how everything else behaves.
- Fixed positions next. The holster and whatever else your agency’s uniform policy places. Policy governs placement, and this guide never overrides it.
- Frequency then. The gear you touch most rides where your hands fall naturally; the gear you touch least fills what’s left.
- Spacing and retention last. Room for keepers, room to sit in a vehicle, nothing riding the buckle overlap.
And the rule that carries all four: build the belt once, on a table, before it ever works a shift. A belt assembled piecemeal over months carries its history instead of its logic.
The two-belt system
The traditional setup is two belts doing two jobs. The liner belt runs through your trouser loops and does nothing but anchor. The duty belt carries the load and never touches a trouser loop. What joins them is the mating system, and it comes in two flavors:
- Hook-and-loop mating. A loop-faced liner pairs with a hook-backed duty belt (or the reverse), locking the two together along their full length. The listings state which face each belt carries — match them as a pair, because they’re a system, not separate purchases.
- Keepers. Belt keepers clamp the duty belt to the liner at intervals. They sell in packs of four for a reason, and the honest sizing rule is simpler than any number: enough that the loaded belt doesn’t migrate. Where a lower profile matters, hidden-snap keepers do the same job without the visible snaps.
Most setups run both worlds at once — mated faces for hold, a few keepers for insurance. The table session tells you what yours needs.
Placement: convention, policy, and reach
Two things decide where gear goes, and they outrank everything you’ll read online — including this.
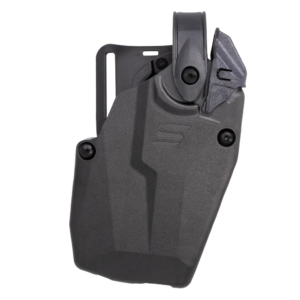
First, policy. Your agency’s uniform policy fixes certain positions, starting with the holster, and the holster’s spot was never this guide’s call anyway: its fitment runs per pistol, light, and optic, which is its own planning problem, and its placement is a policy line. Where policy speaks, that’s the answer.
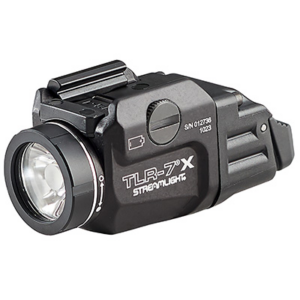
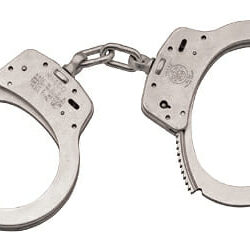
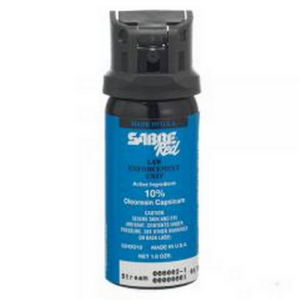
Second, reach. Where policy is silent, convention is just accumulated ergonomics: high-frequency items sit where your hands fall naturally from a standing position, lower-frequency items fill the remaining arc, and the load balances across both hips instead of stacking on one. A covered cuff case, a compact light holder, an OC holder, a double mag case — each is a small placement decision, and the sum of them is whether the belt works with you or against you at hour six.
Write your final arrangement down. Not for you — for the next setup, and for the version of you rebuilding this belt in four years.
Spacing: the part that shows up at hour six
Three spacing realities surface on shift that never surface in the mirror:
- The buckle overlap eats a stretch of frontage nothing can occupy. Plan around it instead of discovering it.
- The seat. A patrol shift is hours in a vehicle, and anything riding the point of your hip or the small of your back will make itself known. The table session should include sitting — in a hard chair at minimum, in the actual vehicle ideally.
- Keeper gaps. Keepers need their own real estate between items. A belt packed edge-to-edge has nowhere to clamp.
This is why the build-it-on-a-table rule exists. The table session is four checks, ten minutes:
- Load and mate the full setup, every pouch filled with what it will actually carry.
- Sit — hard chair minimum, actual vehicle ideally — and note what digs.
- Move — walk, bend, reach across; watch for migration and snag points.
- Adjust and record — fix what complained, then write the final arrangement down.
Ten minutes at a table beats a shift of discovering it the hard way.
The build list
The foundation-to-carriage stack, all from the wall:
- Bianchi Model 7205 Liner Belt — the anchor layer.
- Bianchi Model 7200 Duty Belt — the load layer, loop-faced.
- Bianchi Model 7406 Belt Keepers (4-pack) — the clamping insurance.
- Safariland 62HS Hidden Snap Keeper — the lower-profile alternative.
- Bianchi Model 7300 Covered Handcuff Case — cuff carriage.
- Bianchi Model 7311 Compact Light Holder — the light’s home.
- Bianchi Model 7307 OC/Mace Holder — OC carriage.
- Zero9 Double Mag Case — spare mag carriage.
The full foundation range is on the belt wall, and the carriage spread lives in pouches and duty holsters.
One belt for a whole unit
Everything above scales the same way it reads — you just decide once and buy it many times. For a quartermaster, the belt is the textbook case for one spec per class: one liner spec, one duty belt spec, one keeper standard, one placement convention per assignment. Same pouch, same spot, every belt — reorders get simpler, and nobody inherits a mystery setup with a mystery history.
When the system itself changes
The two-belt system this guide serves has worked for decades, but it’s no longer the only answer: Safariland’s HOLLE system hard-mounts accessories to the belt without keepers or threading, per its manufacturer — a different mechanical answer to the same placement and migration problems. We covered what HOLLE changes and what carries over in its own field notes. Until your agency evaluates something like it, the build order above is the game.
FAQ
What order should equipment go on a duty belt? Foundation first — liner and duty belt, mated. Then the positions your agency’s uniform policy fixes, starting with the holster. Then frequency: the gear you touch most goes where your hands fall naturally. Spacing and keepers come last. Policy governs placement throughout — conventions fill the gaps, they never override it.
How many belt keepers do I need? They sell in packs of four for a reason, but the honest answer is: enough that the loaded belt doesn’t migrate on you. That number is found on a table during setup — load the belt, mate it to the liner, move around, and add keepers where the belt tells you to.
Should I use a loop liner or a hook liner? The mating system decides. Hook-and-loop liners pair with matching duty belts so the two lock together along their full length; plain liners rely on keepers to do the clamping. Match the liner to the duty belt per the listings — the two are a system, not separate purchases.
Do belt keepers still matter with modern belt systems? On the traditional two-belt setup, yes — keepers are what hold the loaded belt to the liner. Hook-and-loop mating reduces how many the setup needs, and hard-mount systems like Safariland’s HOLLE change the picture further, per its manufacturer. The traditional setup remains the default this guide serves.
More gear guides live in the Resource Center. When you’re ready to build: start at the foundation — the belt wall carries the liner-and-duty pairs, and every listing states its width and mating face.